Evolution of LED Lights — DIP, SMD, COB, and MCOB

GreyMatter_LED_2
LED light, circa 1907

First, Some Background…

Electroluminescence was first discovered in 1907 when British experimenter HJ Round used an electrified probe on a chunk of silicon carbide crystal, and it emitted a visible shaft of light.

The first credibly reported creation of an LED was by Russian scientists  in 1927. Eventually, after various reports in the 1950s, American experimenters Robert Brady and Gary Pittman, working at Texas Instruments in 1961, found that gallium arsenide emitted infrared radiation when electrical current was applied. Although this light was not visible to the naked eye, it allowed mass adoption of LEDs for infrared control devices. In 1962, General Electric employee Nick Holonyak Jr produced the first practical visible red LED, and in 1968 the Monsanto company first organized mass produced visible-light LEDs using gallium arsenide phosphate. The new LEDs were quickly and widely adapted and adopted for use in handheld devices such as calculators, wristwatches, and digital displays of all types. The first blue LEDs using gallium nitride were made in 1971 by Jacques Pankove at RCA Laboratories.  But it wasn’t until the mid-1990s that further developments made LEDs bright enough for any replacement of traditional lighting, and most of today’s technology is based on research and discoveries made in the early 21st century.

Evolution of LEDs For Stage Lighting

DIP 2
Triple DIP

DIP LED Technology

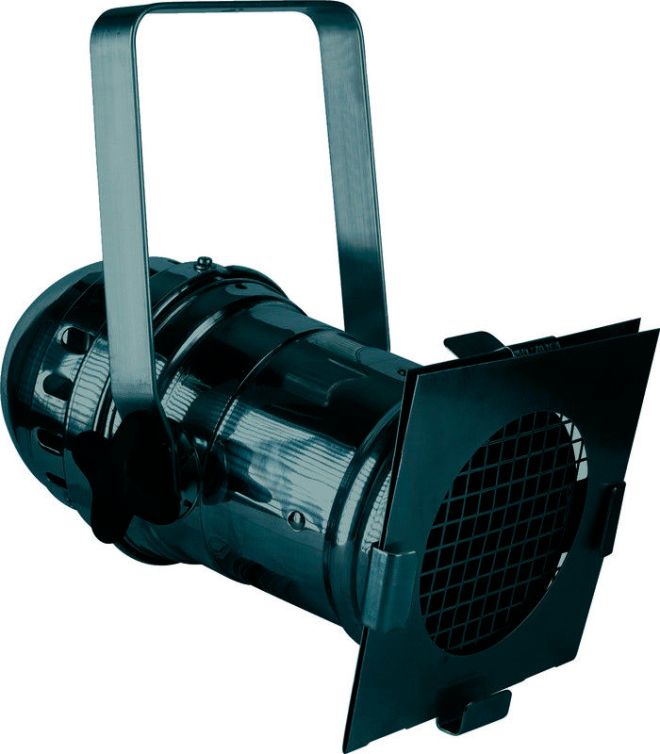
D.I.P. stands for  “dual in-line package.”  This is still the most familiar form seen in stage lighting, though it is rapidly being supplanted by newer technology. An LED is  encapsulated in a 5 or 10 millimeter (sometimes smaller) colored plastic bullet-shaped case. These early LED designs are commonly recognized by their shape and by the long metal connectors protruding for easy solder connections. The solid plastic package of a DIP LED can be designed as a lens to focus its light, so it doesn’t need an external reflector like an incandescent stage light. Arrays of DIP  LEDs are still being used in stage lights today because of their brightness and long lifespan, but I don’t think they hold a candle to…

SMD LED Technology  

SMD 3
SMD, not WMD

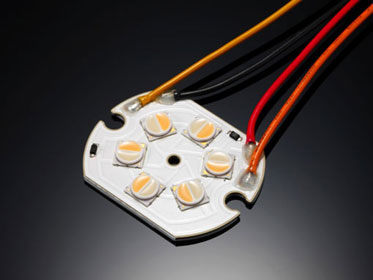
S.M.D. stands for “Surface Mounted Diode.” SMD chips allowed manufacturers to automate production, improve quality control, and offer a product that features better heat dispersion, high lumen output (high lumen flux ), and longer overall life (low optical decay) than its predecessor, the DIP LED . The SMD chip itself is created from layers of man-made nano sapphire and gallium crystal substrates. These crystals are ‘grown’ in scientific chambers and then sliced and layered and finally bonded to a ceramic base that can be easily mounted in various packages and forms of lighting. Far from being outdated, SMD LED continues to improve in its lumens per watt output, and these small, maintenance-free, and long-lasting solid-state light sources will be around for many years to come.

COB LED Technology

COB 2
No corn, just the COB

C.O.B. stands for “Chip On Board.” The greatest power densities in the smallest space are often the basis for unique selling points of various lighting products on the market, and COB technology allows these criteria to be realized by direct contact of the LED semiconductors on printed circuit boards. Theoretically, this allows improved thermal management (leading to longer LED life), higher packaging density, and thus higher performance. We are now beginning to see more COB technology in stage and effects lights…. Time will tell how well they will be accepted.


MCOB LED Technology

MCOB 2
The Next Big Thing?

The next generation of LED is said to be MCOB, or “Multi Chip On Board.” This new lighting technology consists of many small chips integrated into one large single chip.
These are beginning to be used now in floodlights and high bay lights, but don’t yet seem to be in common use in stage lights or effects lights. In quantity, they are cheaper to assemble than multiple single chips and so make some products such as street lights and high bay lights more affordable than previously. But MCOB lights are still in their infancy, and currently still more expensive than SMD and COB for use in smaller applications like stage and effect lighting.

Thanks to LED Aladdin Limited for this info and the basis of this article. The article in its original form may be seen at   http://ledaladdin.com/light_guides/LED_Lighting_Evolution.html

Please visit http://www.BurrightLights.com to see some good lighting options for Deejays, Musicians, Churches, and small venues.

Evolution of LED Lights — DIP, SMD, COB, and MCOB

Basic Types of Stage Lights

early stage lights
Og Invents Stage Lighting, circa 50,000 BC

I imagine the very first ‘stage light’ was the light of a burning wood fire that illuminated the activities of our ancestors in pre-history. Eventually we progressed to candles and oil lamps, then gas, and finally, less than 150 years ago, electric light. This is a brief comparison of types of stage lights commonly in use these days: Incandescent, Halogen, HMI, and LED Lights.

edison
Tom and his New-Fangled Stage Light

INCANDESCENT LIGHT BULB:
This is the oldest form of electric light and has its roots in the technology developed by Thomas Edison and others. In a glass container filled with an inert gas, usually argon, a electric current is allowed to to flow through a filament, usually made of tungsten. When the power is high enough, the tungsten will shine brightly. An incandescent light bulb traditionally only emits about 5% light while 95% is given off in the form of heat.

Benefits
* Provides an even light without flicker.
* It’s simple to dim the light’s intensity, since brightness is directly proportional to the current.

Disadvantages
* Very high power consumption compared to the brightness
* Very high heat output compared to the brightness — poor energy exchange.
* The filament is consumed during the burn time, which results in a relatively short life span (maybe only 50-100 hours depending on handling). Also, the atoms released by the filament during burning settle on the inside of the glass container, which continuously reduces luminous efficiency and color spectrum.

halogen
Remember These?

HALOGEN LAMP:
The halogen lamp is a further development of the incandescent light bulb, with argon being replaced by a halogen gas such as bromine or iodine. The filament has also been made thinner and has an increased burning temperature. This results in a 2-4x increase in service life, and a constant light output and color temperature throughout the lamp’s lifetime.

Benefits
* Produces even light with no flicker
* Easy to dim
* Constant light output and color temperature..

Disadvantages
* High power consumption compared to the brightness
* High heat output compared to the brightness
* High temperature of the filament makes it sensitive to mechanical impact and requires extra care in installation and use in order not to cause thermal damage to materials or people

ballast
Definition of ‘ballast’:  ‘any heavy material’

HMI LAMP:
HMI is an acronym for Hydrargyrum medium-arc iodide. (Hydrargyrum is Latin for mercury.) Unlike the previously described lamps, an HMI lamp has no filament. Instead, it uses mercury vapor mixed with metal halides in a quartz-glass envelope with two tungsten electrodes of medium arc separation.
In this electric arc, both the mercury vapor and metal halides create a light-emitting plasma, resulting in a luminous efficiency nearly four times that of a similarly powered halogen lamp. To ignite the arc and maintain the plasma, an external ballast is required.

Benefits
* Very high light output
* Very high color temperature

Disadvantages
* Requires external ballast for arc ignition (up to 70,000 volts)
* A magnetic ballast is cheap but big and clumsy and generates a light that may flicker on video. A magnetic ballast can only be dimmed by using a mechanical aperture.
* The electronic ballast allows dim of the light and be made flicker free, but is much more expensive.
* HMI lamps can explode, especially during the ignition of the arc. Most fixtures have guards in place to prevent injury from flying shards of hot glass, but it is still advisable to take caution.  Explosion is more likely to happen if an HMI lamp is more than 50% of its specified usable life, or if it is dropped or otherwise severely jolted.

led
Look, Ma: No Bulb!

LED LAMP:
Unlike all other lamps, an LED light doesn’t “burn” at all. Instead, it uses semiconductor materials to provide light. Simply put, when a voltage is applied to an LED, electrons are allowed to recombine with so-called “electron holes” inside the semiconductor material, releasing energy in the form of photons (light particles). The effect is called electroluminescence. The color generated is determined by the ‘energy gap’ of the chip. The first practical LED was produced in 1962 — since then, they’ve dropped in cost from about $200 each to about $.05 each.
The technology is still developing, and it is now possible to manufacture LED chips with up to 5w power, though 3w is currently common. For higher brightness, several LED chips are combined, resulting in LED lights of up to 300w, usually made by combining  100 pieces of 3w chips.
For best effect, LED lights require special arrangements in the drive circuitry or they will have the same problem as the HMI — flicker on video or TV camera due to the driving voltage alternating current. Most professional LED stage lights today have anti-flicker circuitry.

Benefits
* Pure light without UV-artifacts
* Significantly better efficiency than traditional incandescent and halogen light bulbs
* Very low heat
* Much lower power consumption than incandescent, halogen or HMI
* Excellent dimming ability
* Very long lifespan — up to 100,000 hours
* Contains no toxic substances, making them very environmentally friendly
* Insensitive to shock
* Slow failure; unlike other light sources, LEDs ‘die’ slowly
* No risk of explosion

Disadvantages
* Color temperature changes over time
* Light output and color temperature can vary in relation to temperature
* Drive-sensitive, which requires very precise control of both voltage and current in order to avoid flicker, and to not damage the LED chips — LED lights should never be used on a dimmable circuit or with dimmer packs.

This post is adapted from an article at Acquris Media: http://www.acquris.se/media/index.php?id=&lang=en with some info from Wikipedia. If there are major errors — don’t sweat the small stuff! — please let me know.

Andy Burr — http://www.BurrightLights.com

Basic Types of Stage Lights

Make Your Own Fog Juice

As you know, a bit of fog makes light beams visible and adds tremendously to almost any lighting effect.  Water-based fog ‘juice’ or fog fluid sold by the major companies (Chauvet, American DJ, etc) can cost about $20 for a quart. Here’s a way to make it yourself for under $10 per gallon.

(I don’t recall where I found this info. Let me know and I’ll be happy to give credit!)

What You’ll Need:
• Distilled Water • Glycerine • Container • Measuring Cup • Bleach • Fog Machine

Supplies: Unless you have a distilling apparatus, simply buy a gallon of DISTILLED (not purified) WATER at Walgreens or Wal-Mart. Glycerine, a common ingredient in beauty products and commercially baked goods, is a bit more difficult, but not much: you’ll want Food Grade Glycerine, because it’s made for human consumption, not that you’ll be drinking the stuff, or even breathing it in any quantity. But this is important: don’t use other types of glycol compounds unless you’re a chemist — some are poisonous. Use ONLY food-grade pure glycerine, not a sorbitol-based substitute! The brand I found is by CK Products (www.ckproducts.com), and I paid under $8 for 20-oz bottle at a party supply store.

Your container needs to be clean — it can’t hurt to boil it to make it sterile. If you want to make a gallon at a time, you can mix it right in with the distilled water it the container it came in. I use a smaller container because it’s easier to carry around to gigs, and I like to experiment with different mixtures.

18x3 backlights
Mix the glycerine with the water.
For Very Thick Smoke:
30% Glycerine | 70% Water
For Medium Thick Smoke:
20% Glycerine | 80% Water
For Less Thick Smoke:
15% Glycerine | 85% Water
(20 oz glycerine and 108 oz water — empty 20 oz from your gallon, add a whole bottle of 20oz glycerine)
These proportions aren’t exact. You can experiment (easier if you make small amounts — say, a pint or quart at a time) to find the proportion that works best for your needs. Here are some figures to help you calculate mixtures:
1 gal = 128 oz     1 quart = 32 oz     1 pint = 16 oz
Mix by shaking. Add a few drops of bleach to a pint or quart mix, again, to help prevent bacteria growth.

 
The ‘very thick’ proportions are good for Halloween effects, but not much else. I prefer a lighter fog because it causes fewer problems with smoke detectors, and sensitive band and audience members, because it leaves much less surface residue on whatever it comes in contact with, and because if you want to make light beams visible on  stage, the ‘less thick’ is all you’ll need. The ‘less thick smoke’ will dissipate faster, but you simply blow more as needed. Anything thicker can be annoying to the performers (who’ll be breathing the stuff!) or any person with respiratory problems, and is more likely to set off smoke-detector alarms. The last thing you need at your gig is for a smoke alarm to go off, and many venues forbid use of fog machines because of this. Also, with the Thick Smoke proportions, you’re more likely to get a smelly, sticky residue on clothes and equipment. Venues don’t like that much, either. Last but not least, the ‘thick’ recipe will require you to clean your machine more often. If you use a LIGHT SMOKE recipe, these problems are much less likely to happen.

 
When you first use your machine, make sure the juice intake pipe is actually submerged in the juice — sometimes it’s bent and is above the level of the liquid in the reservoir. Try to arrange and re-bend it so it is down low in the reservoir. When you use your Fogger, be sure to check the Juice level OFTEN….  if it runs with no juice, it’ll ruin it!

 
It’s okay (in fact, I recommend) that you keep some juice in your machine even when stored, to help prevent the tubes and pump from drying out and cracking, but don’t let it sit for months: run it a bit now and then. The fog Machine is similar in some ways to a Mr Coffee-type coffee-maker — after extended use, glycerine residue or mineral deposits from water or bacteria can build up inside the pump and tubes. Clean your machine with a white vinegar and water solution, letting it run for a while, cleaning out the nozzle, pump, condenser, and tubes (Don’t do this indoors — it’s stinky!). Empty any remaining vinegar solution, refill with Fog juice, and run a bit through it. Do this regularly and it will last much longer. There are more details and some good info here: http://www.bigclive.com/smoke.htm

Make Your Own Fog Juice